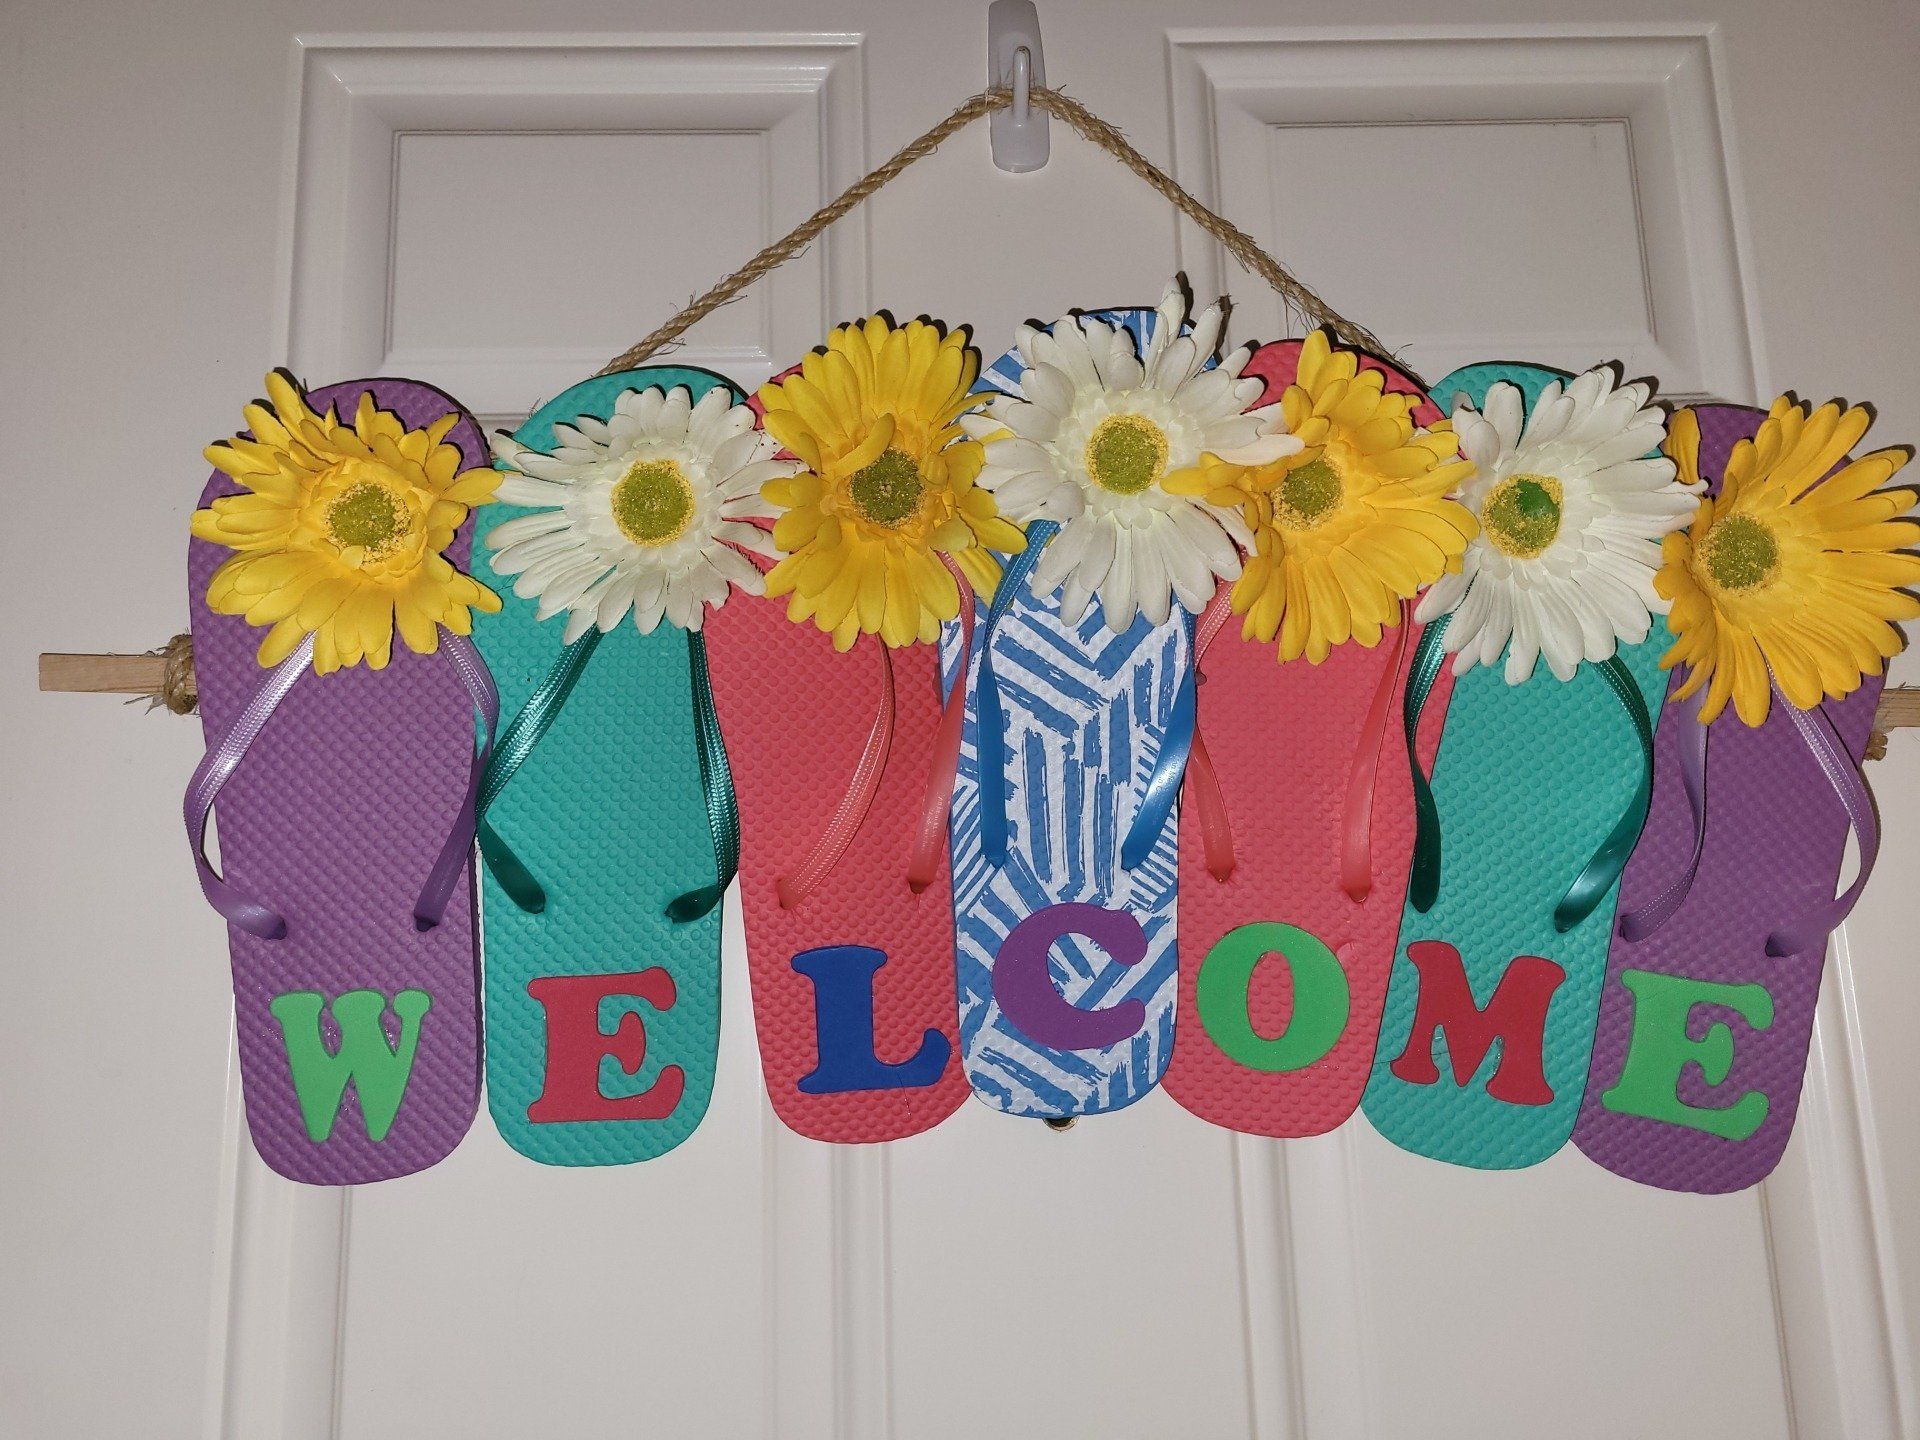
Monthly Project: Flip Flop Welcome Sign
Crystal Kikel
The Supply List (From the Dollar Tree)
- 5 Sets of Flip Flops different colors (solid colors)
- 1 Bunch of Gerbera Daisies (Yellow and White or Multicolored)
- Glue Gun and sticks
- 36-inch Square Wooden Dowel
- Ribbon or rope for hanging
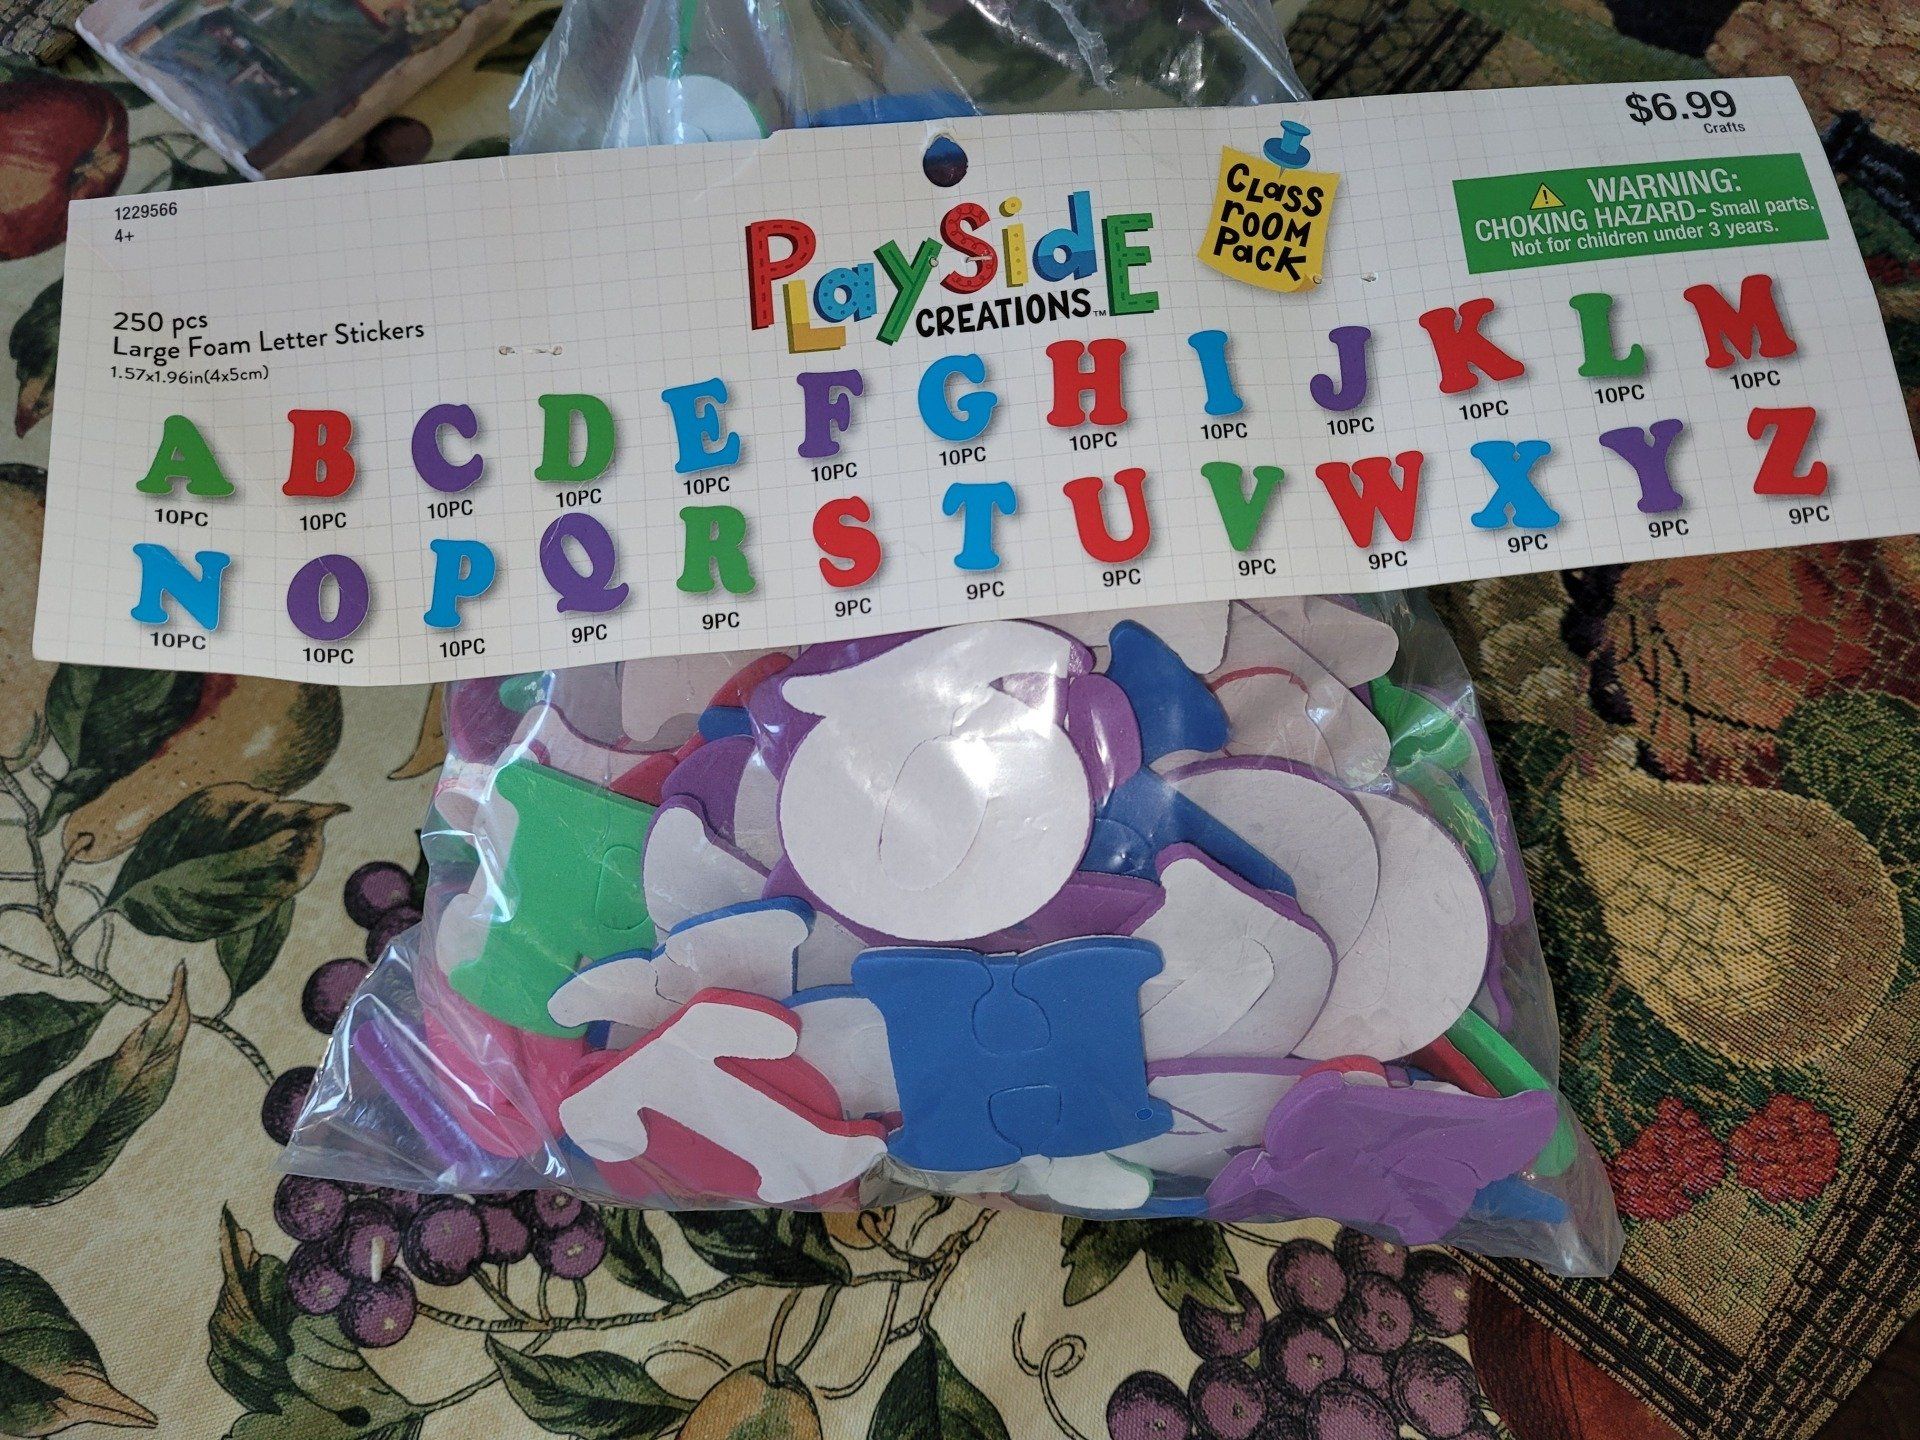
- Wooden or Foam Letters
- Floral Wire
- Wire Cutters

Step 1:
Arrange the flip flops how you want them on the dowel. Place the flip flops upside down and tie the floral wire around the toe loop and cross over to the foot hold on both sides, repeat until all flip flops are secure. Glue gun the flip flops to the wooden dowel.
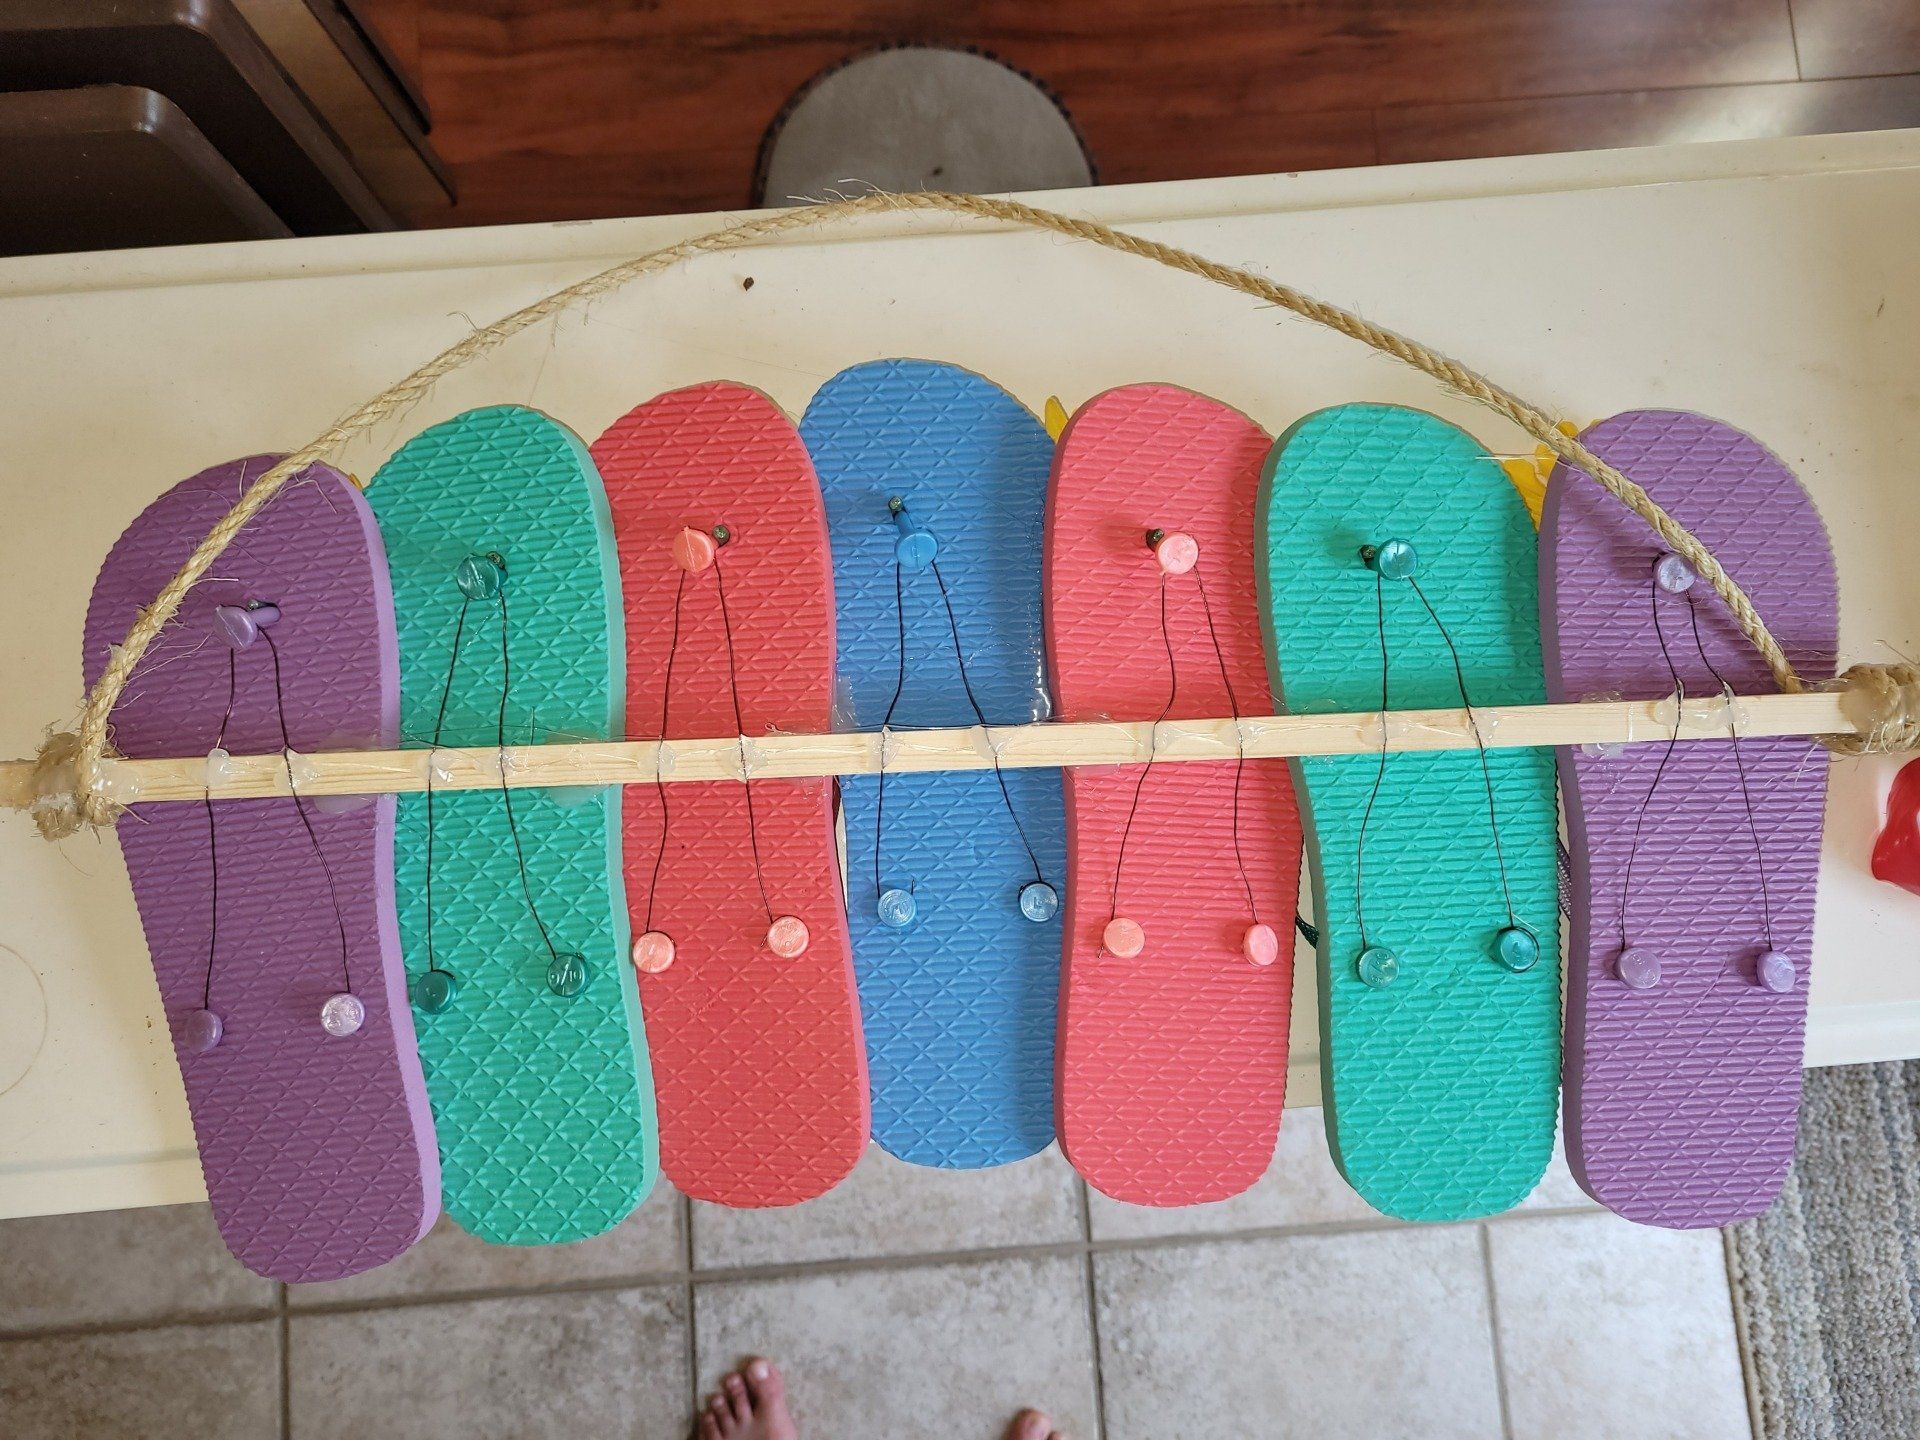
Step 2:
Tie the ribbon around the ends of the dowel. Glue Gun the ribbon (or Rope) and let dry.
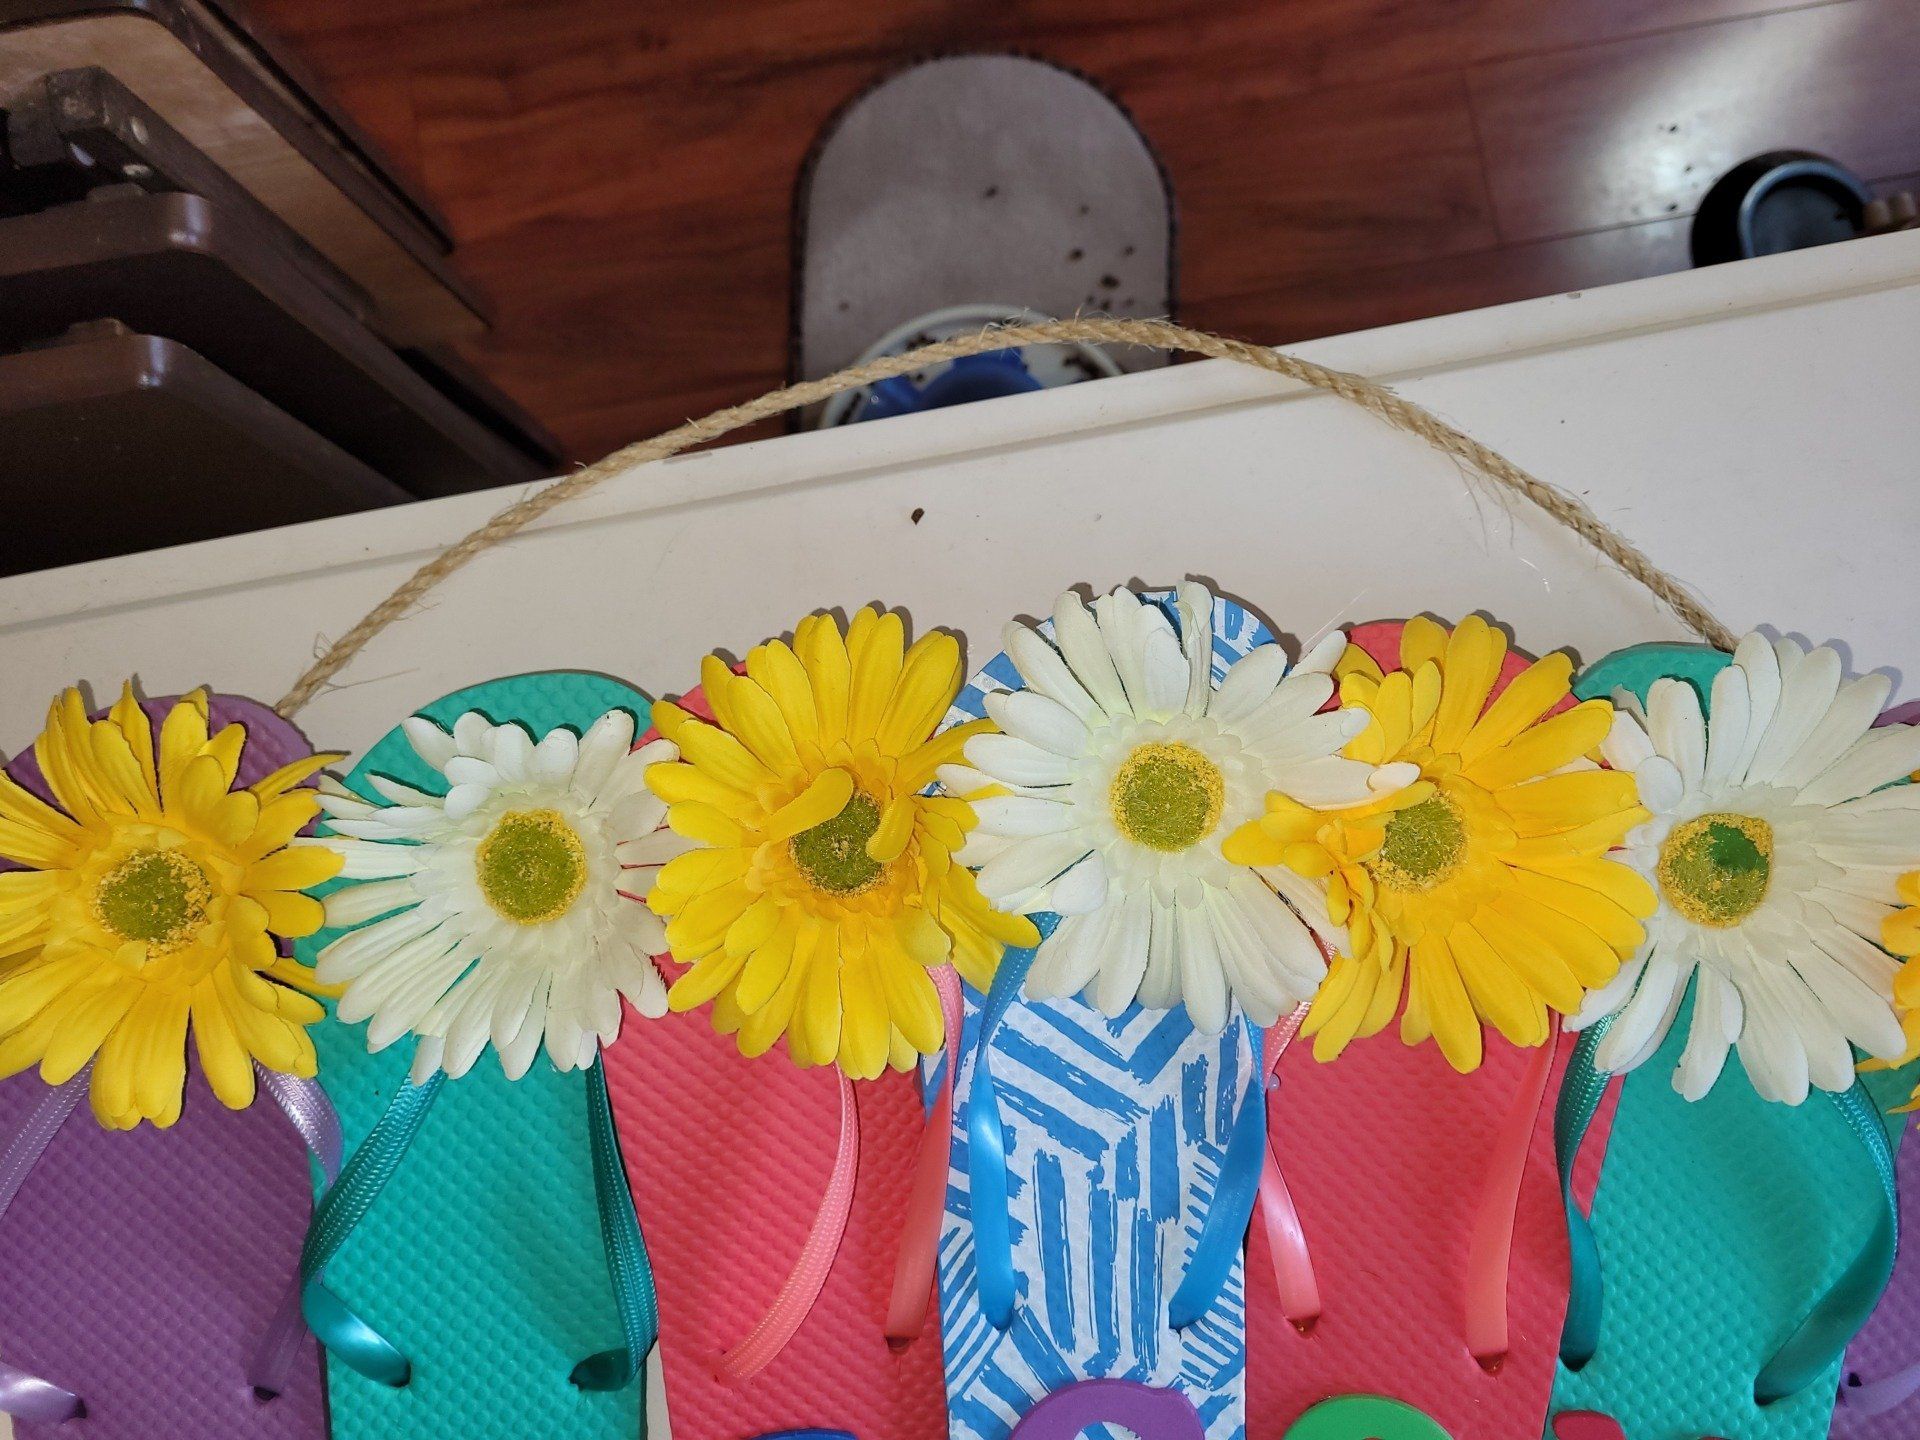
Step 3:
After the glue has dried, flip over and cut the end of the flowers so they fit in the in the toe of the flip flop. Glue gun the flowers in place.
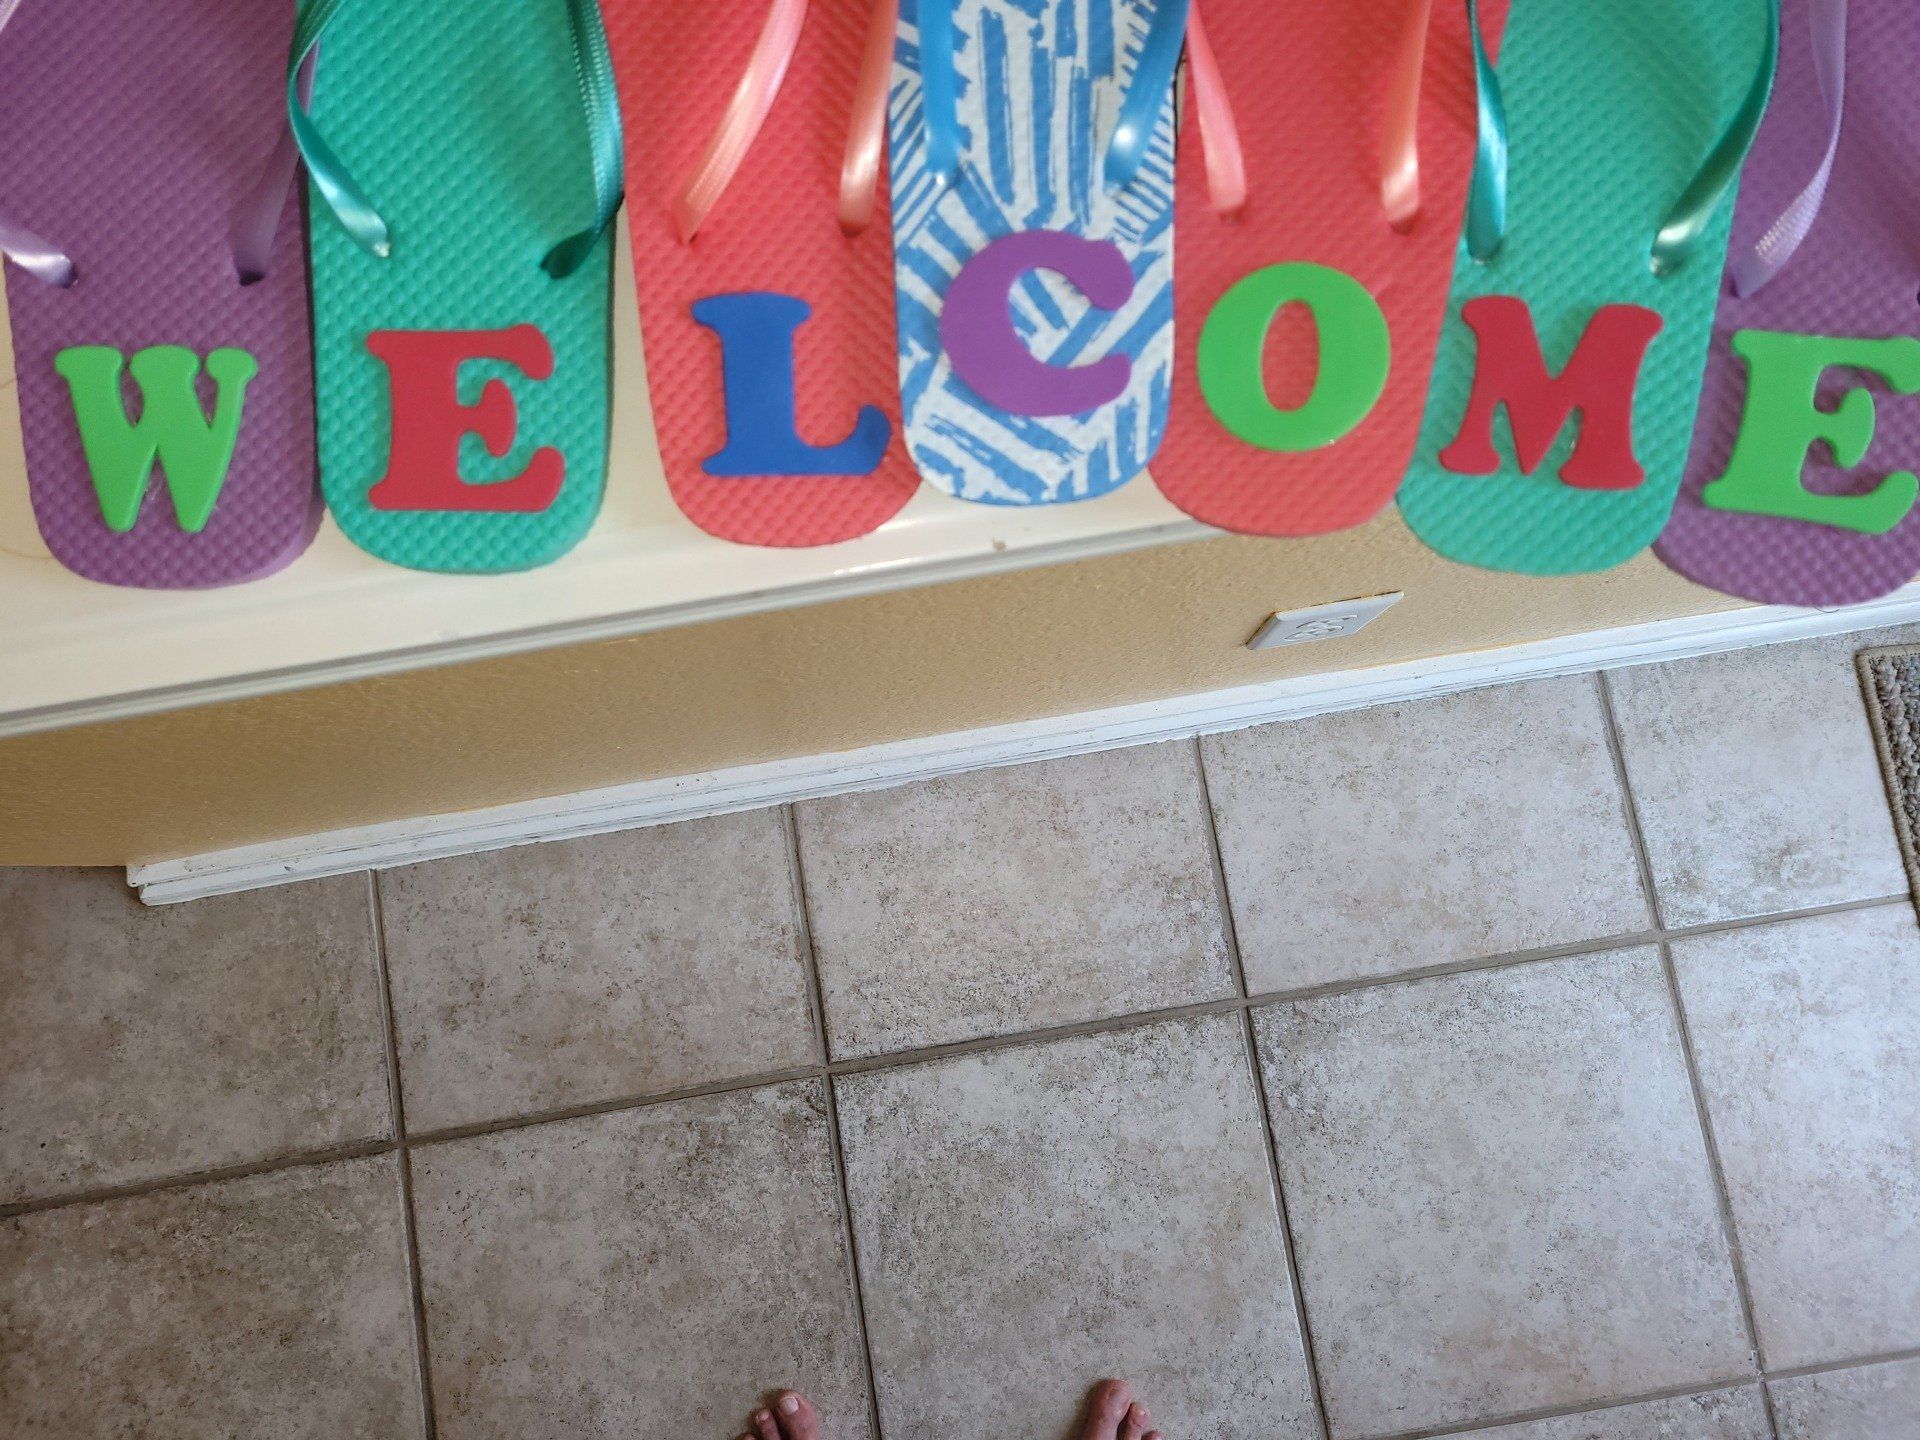
Step 4:
Arrange the WELCOME letters on the heal of the flip flop and glue gun them on
Step 5:
Find a nice place to hang your new project.
Send us a photo when you are done at Crystal@T-Werx.com

In an increasingly uncertain economic landscape, recession-proofing is gaining more traction. Small businesses, especially those with fewer than five employees, are particularly vulnerable during economic downturns. The margin for error is thin, and the resources are often limited. How do you build a protective financial and operational buffer....
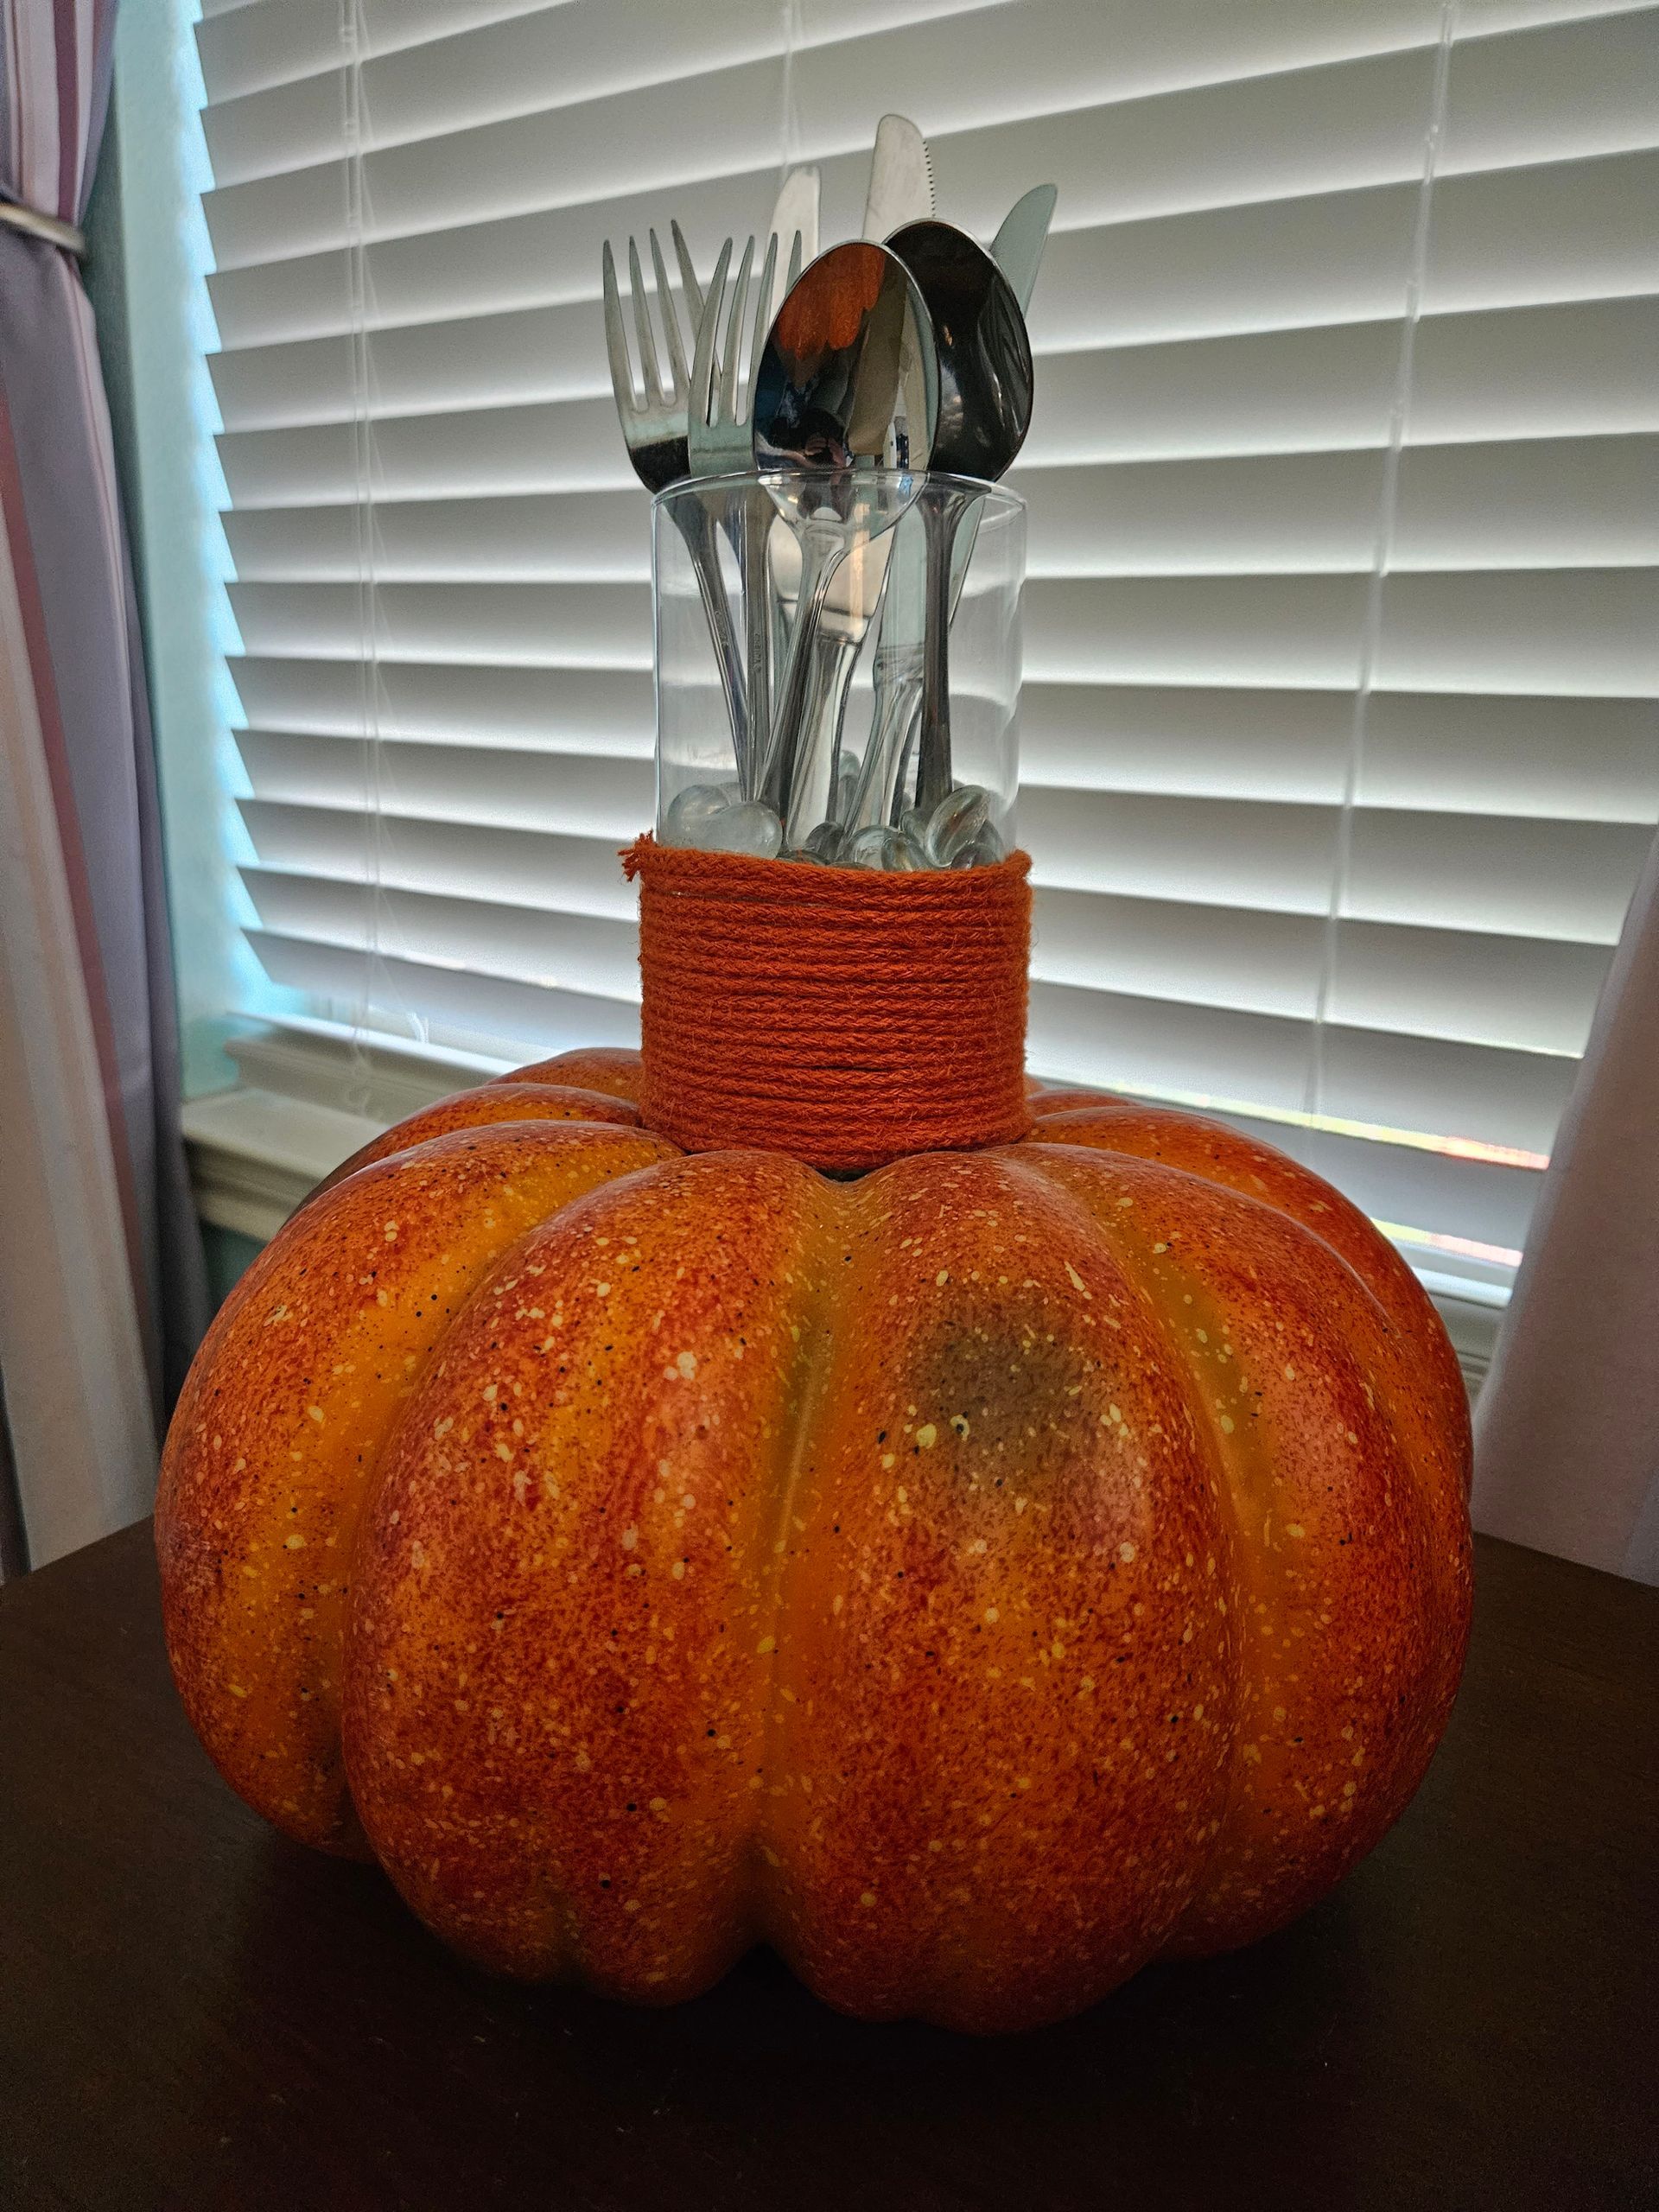
Supplies: 1 Large Foam Pumpkin Orange Rope Clear Glass Gem Filler Knife Glue Gun Instructions: Mark the top of the pumpkin using the vase. Cut into the pumpkin and remove some of the filling. Cut as deep as you think you want your vase to fit into the pumpkin. Wrap the rope around the vase about a third of the way up, glue gun into please. Fill the vase half the way up with the gem filler. Place silverware in the vase and enjoy.
This easy and fun project and hang up all year around.